No edit summary |
No edit summary |
||
| Line 1: | Line 1: | ||
| − | {{cleanup}}[[File:Fishingholv1.png|right|250px]] |
+ | {{cleanup}}[[File:Fishingholv1.png|right|250px]] |
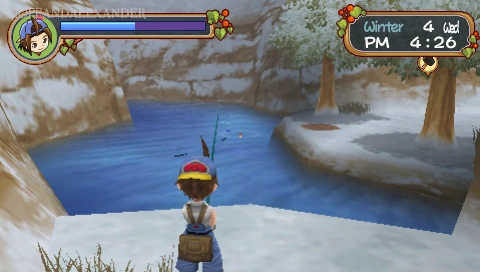
Like in other games, fishing is a good source of income and can be an important one. There are four total fishing spots: two that are available at the start of the game and two that must be unlocked. The first two that are available to you are Mallard Lake and Crystal Bay. The other two are fishing spots located beside the Harvest Goddess Pond (pictured right) and the Underground Lake located in the mines. |
Like in other games, fishing is a good source of income and can be an important one. There are four total fishing spots: two that are available at the start of the game and two that must be unlocked. The first two that are available to you are Mallard Lake and Crystal Bay. The other two are fishing spots located beside the Harvest Goddess Pond (pictured right) and the Underground Lake located in the mines. |
||
| + | |||
| + | |||
In order to unlock the other two, you will have to meet Ponta in the beginning of the year when you enter Mallard Lake. Whenever you give him a fish, he will ask if you would like him to make a fish print of it. 10 completed fish prints will unlock the fishing spot beside the Harvest Goddess Pond. 20 completed fish prints will unlock the fishing spot in the mines. |
In order to unlock the other two, you will have to meet Ponta in the beginning of the year when you enter Mallard Lake. Whenever you give him a fish, he will ask if you would like him to make a fish print of it. 10 completed fish prints will unlock the fishing spot beside the Harvest Goddess Pond. 20 completed fish prints will unlock the fishing spot in the mines. |
||
'''Note: Not every fish can be turned into a fish print. It would be best to give Ponta every fish to turn into a fish print. Those that can't will gift you a recipe instead.''' |
'''Note: Not every fish can be turned into a fish print. It would be best to give Ponta every fish to turn into a fish print. Those that can't will gift you a recipe instead.''' |
||
Revision as of 22:06, 25 October 2019
Like in other games, fishing is a good source of income and can be an important one. There are four total fishing spots: two that are available at the start of the game and two that must be unlocked. The first two that are available to you are Mallard Lake and Crystal Bay. The other two are fishing spots located beside the Harvest Goddess Pond (pictured right) and the Underground Lake located in the mines.
In order to unlock the other two, you will have to meet Ponta in the beginning of the year when you enter Mallard Lake. Whenever you give him a fish, he will ask if you would like him to make a fish print of it. 10 completed fish prints will unlock the fishing spot beside the Harvest Goddess Pond. 20 completed fish prints will unlock the fishing spot in the mines.
Note: Not every fish can be turned into a fish print. It would be best to give Ponta every fish to turn into a fish print. Those that can't will gift you a recipe instead.
Fish
Below you will find a list of fish that you can catch, when you can catch them, where, and other information that was deemed important.
- Alaska Pollock – Medium – Fall, Winter – Crystal Bay, Underground Lake – Deep (Easy) Medium (Hard) Shallow (Hard) – 70G - Yes
- Albacore – Large – Spring, Fall – Crystal Bar – Deep (Easy) Mediuim (Medium) – 90G - Yes
- Amerjack – Medium – Crystal Bay – Underground Lake – Deep (Normal) Medium (Normal) Shallow (Normal) – 80G - Yes
- Anchovy – Small – Summer, Fall – Crystal Bay – Deep (Easy) Medium (Normal) Shallow (Hard) – 30G – Yes
- Black Bass – Medium – All – Underground Lake – Deep (Easy) Medium (Normal) Shallow (Hard) – 70G - Yes
- Black Porgy – Medium – Spring, Fall, Winter – Underground Lake – All levels (Normal) – 90G - Yes
- Black Rockfish – Small – Spring – Crystal Bay – Medium (Hard) Shallow (Easy) – 20G – Yes
- Black Scraper Fish – Medium – Fall, Winter – Crystal Bal – Medium (Normal) Shallow (Easy) – 80G - Yes
- Blotched Snakehead – Medium – All – Underground Lake – All levels (Normal) – 90G - Yes
- Blue Homard – Medium – Summer, Fall – Underground Lake – Deep (Easy) Medium (Normal) Shallow (Normal) – 100G - No
- Blue Mackerel – Small – Summer, Fall – Crystal Bay – Deep (Hard) Medium (Easy) Shallow (Normal) – 40G – Yes
- Catfish – Medium – Summer – All except Crystal Bay – Deep (Easy) Medium (Normal) Shallow (Hard) – 60G - Yes
- Char – Small – Winter – Goddess Spring – All levels (Normal) – 40G – Yes
- Chicken Grunt – Medium – Fall, Winter – Mallard Lake, Goddess Spring – Deep (Easy) Medium (Normal) Shallow (Hard) – 70G - Yes
- Cod – Medium – Winter – Crystal Bay, Underground Lake – Deep (Easy) Medium (Hard) Shallow (Hard) – 80G - Yes
- Colbalt Rainbow Trout – Small – Spring – Underground Lake – All levels (Normal) – 60G – Yes
- Dace – Medium – Spring – Goddess Spring – Deep (Easy) Medium (Normal) Shallow (Normal) – 50G - Yes
- Dark Chub – Small – Spring – Goddess Spring – All levels (Normal) – 40G – Yes
- Dark Sleeper – Medium – Winter – Mallerd Lake, Goddess Spring – Deep (Easy) Medium (Normal) – 60G – Yes
- Dolphinfish – Large – Summer – Underground Lake – Deep (Easy) Shallow (Normal) – 140G – No
- Eel – Medium – Summer, Fall – All except Crystal Bay – Deep (Easy) Medium (Normal) Shallow (Hard) – 60G – Yes
- Flounder – Medium – Summer – Crystal Bay, Underground Lake – Deep (Easy) Medium (Hard) – 80G – Yes
- Garden Eel – Medium – Spring, Summer – Crystal Bay – Deep (Normal) Medium (Easy) Shallow (Hard) – 80G – Yes
- Horse Mackerel – Small – Summer, Fall – Crystal Bad – Deep (Normal) Medium (Easy) Shallow (Hard) – 40G- Yes
- Hutchen – Large – Spring – Underground Lake – All levels (Normal) – 110G – No
- Leatherfish – Medium – Fall – Crystal Bay – Medium (Normal) Shallow (Easy) – 60G - Yes
- Loach – Small – Spring, Summer – Goddess Spring – Deep (Hard) Medium (Normal) Shallow (Easy) – 30G – Yes
- Lobster – Medium – Summer, Fall – Crystal Bay – Deep (Easy) Medium (Normal) Shallow (Normal) – 70G – No
- Longtooth Grouper – Large – Summer – Crustal Bay – Deep (Easy) Medium (Normal) – 80G – Yes
- Mackerel – Small – Summer, Fall – Crystal Bay – Deep (Hard) Medium (Easy) Shallow (Normal) – 30G – Yes
- Masu Salmon – Small – Winter – Goddess Spring – All levels (Normal) – 40G – Yes
- Monfish – Large – Spring, Winter – Underground Lake – Deep (Easy) Medium (Hard) – 120G - No
- Mountain Grunt – Medium – All except Summer – Mallerd Lake, Goddess Spring – Deep (Easy) Medium (Normal) Shallow (Hard) – 60G – Yes
- Nagi – Large – Spring – Crystal Bag – All levels (Normal) – 90G – Yes
- Ocellated Octopus – Medium – Fall, Winter – Crystal Bay – Deep (Easy) Medium/Shallow (Normal) – 50G -No
- Octopus – Medium – Fall – Crystal Bay – Deep (Easy) Medium/Shallow (Normal) – 40G – No
- Pacific Flying Squid – Medium – All – Crystal Bay – All levels (Normal) – 40G – Yes
- Pale Chub – Small – Spring – Goddess Spring – Deep (Normal) Medium/Shallow (Easy) – 40G – Yes
- Pike – Medium – Fall – Crystal Bay – Medium (Normal) Shallow (Easy) – 60G – Yes
- Porgy – Medium – Spring, Summer – Crystal Bay – All levels (Normal) – 80G – Yes
- Pirate Treasure – All – Crystal Bay – Deep (Easy) – 1200G – No
- Rainbow Trout – Small – Spring – Mallard Lake, Goddess Spring – All levels (Normal) – 40G – Yes
- Raven Globefish – Medium – Fall, Winter – Crystal Bay, Underground Lake – All levels (Normal) – 100G – Yes
- Red Rockfish – Small – Spring – Underground Lake – Medium (Hard) Shallow (Easy) – 40G – Yes
- Right-Eye Flounder – Medium – Winter – Crystal Bay, Underground Lake – Deep (Easy) Medium (Hard) – 70G – Yes
- Sakura Salmon – Small – Fall, Winter – Underground Lake – All levels (Normal) – 60G – Yes
- Salmon – Large – Fall – Crystal Bay, Goddess Spring – All levels (Normal) – 80G - Yes
- Sardine – Small – Summer, Fall – Crystal Bay – Deep (Easy) Medium (Normal) Shallow (Hard) – 40G – Yes
- Shrimp – Medium – All except Winter – Crystal Bay – Deep (Easy) Medium (Normal) – 40G – No
- Smelt – Small – Fall, Winter – Mallard Lake, Goddess Spring – All levels (Normal) – 20G – Yes
- Spanish Mackerel – Large – Spring – Crystal Bay – All levels (Normal) – 90G – Yes
- Sunken Treasure – All – Crystal Bay – Deep (Easy) – 1000G - No
- Surfsmelt – Small – Spring, Winter – Mallard Lake, Underground Lake – All levels (normal) – 20G – Yes
- Squid – Medium – Summer – Crystal Bay – All levels (Normal) – 60G – No
- Sweetfish – Small – Summer – Goddess Spring – Deep (Hard) Medium (Normal) Shallow (Easy) – 40G – Yes
- Sweet Shrimp – Small – Summer, Fall – Crystal Bay – Deep (Easy) Medium (Normal) – 20G – No
- Swordfish – Large – Spring, Summer – Crystal Bay, Underground Lake – Meduim (Normal) Deep (Easy) – 150G – No
- Tiger Globefish – Medium – Fall, Winter – Underground Lake – All levels (Normal) – 80G – Yes
- Treasure Chest – All – Underground Lake – Deep (Easy) – 500G – No
- Tuna – Large – Fall – Crystal Bay, Underground Lake – Medium (Normal) Deep (Easy) – 160G – Yes
- White-Spotted Char – Small – Summer – Goddess Spring – All levels (Normal) – 50G – Yes
- White Trevally – Small – Summer – Underground Lake – Deep (Normal) Medium (Easy) Shallow (Hard) – 50G – Yes
- Young Amberjack – Medium – Winter – Crystal Bay – All levels (Normal) – 60G – Yes
| ||||||||||||||||||||||||||||||||||||